Tips, Tricks and Shortcuts for using iThink and STELLA
I recently saw an iThink/STELLA power user change the direction of a Flow with a simple keystroke. And I thought the only way to change a Flow direction was to delete and redraw it! This prompted me to search for other tricks about using the software that I might not be aware of. As it turns out there are quite a few! I took a stab at creating a list.
The list ranges from Paintbrush tips to keyboard shortcuts. If there are other tricks that you know about, please post a comment and share them with the rest of us!
Flows
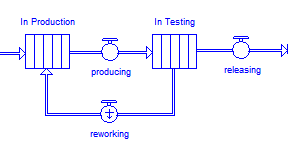
• Bend a Flow — Drop a Flow and start dragging it. When you want it to change direction at a 90 degree angle, hold the shift key while you move the cursor in the direction you want the Flow to go.
• Change the Flow direction — Hold the Control key and click on the head of the arrow.
• Disconnect a Flow — Click and hold on the end of the Flow (either the arrow end or the tail end) to drag it from a Stock.
Paintbrush
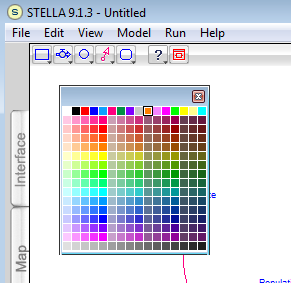
• Move Color Palette — Click on the Paintbrush tool and hold while moving cursor until it moves the whole palette. Drag it anywhere on the window.
• Eyedropper Tool — If you want to duplicate the color of an object but you are not sure which shade you used, you can use the Eyedropper to “extract” the color and reuse it. To identify the color of an entity, select the Paintbrush; do a Control-shift (Windows) or Command-shift (Mac) , and the Eyedropper will appear. Click on the entity and the Paintbrush will take on the color of that entity. Now you can color your model as before.
Toolbar
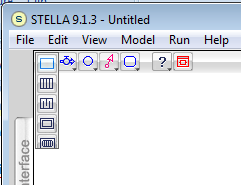
• Tool drop down list — Click on a tool and hold to get drop down menu of related choices.
• Activating the last tool — If you have just added an object to your model such as a Stock, and you want to add another, press and hold the Alt key(Windows) or Option key (Macintosh) and click on the model layer to drop additional Stocks. You can use the Alt key to go to back to the last tool you used.
• Sticky tool — Double-click on an object in the toolbar to make it “sticky”. In this mode the software will not switch back to the arrow after you have dropped the object on the page. You can keep adding more of the same objects until you hit the Esc key or click on another tool.
• Change default color of a tool — Select a color from the Paintbrush palette, then hold the Alt key (Windows) or Option key (Macintosh) and click on the item in the toolbar.
Graphs & Tables
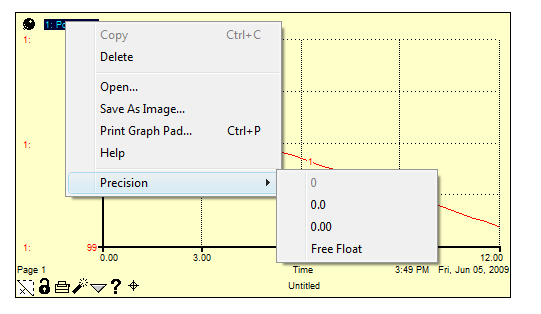
• Change precision for a graphed variable — Right-click, (Control-click on Macintosh) on the name of the variable in the graph or table. Select Precision from the menu and choose from the available options.
• Delete pages — Click on the Dynamite tool in the toolbar and drag it to the dog ear on the lower left corner of the graph or table. Click again to delete the current page.
• Clear data — Click on the Dynamite icon on the graph or table itself to clear the data.
• Color variables — Click on the Paintbrush and select a color. Click on the variable name in the graph or table to change the color.
Keyboard Shortcuts
Here is a table of menu shortcuts. It is organized by software layer. I also added some navigation and miscellaneous shortcuts.
Table of keyboard shortcuts (PDF file) ![]()
Miscellaneous
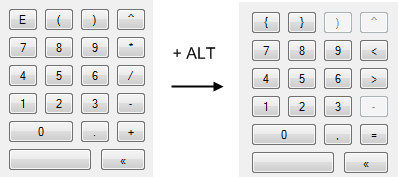
• Changing input keys on the Calculator — To change the available input keys on the Calculator, press the Alt key (Windows) or Option key (Mac).
• Navigating out of a Module while building a story — If the story you are building takes you into a Module, you can back out of the Module by holding the Control key (Windows) or Option key (Macintosh) and double-clicking on a blank part of the model layer.
• Quitting out of a Runtime model — To exit out of Runtime model, click on Control key and Q (Windows) or Option key and Q (Macintosh).
So let us know if you have more tips, tricks or shortcuts to share by adding a comment to this post!